
Inviting Team Members
This guide covers how team administrators invite new members, choose their role, and decide which workspaces they land in.
Invite a new member
- Open Settings → Members and click Invite new member.
- Enter their email (required), and optionally their first name, last name, and phone number.
- Choose a role (see below).
- Optionally choose Workspaces (see below).
- Click Invite.
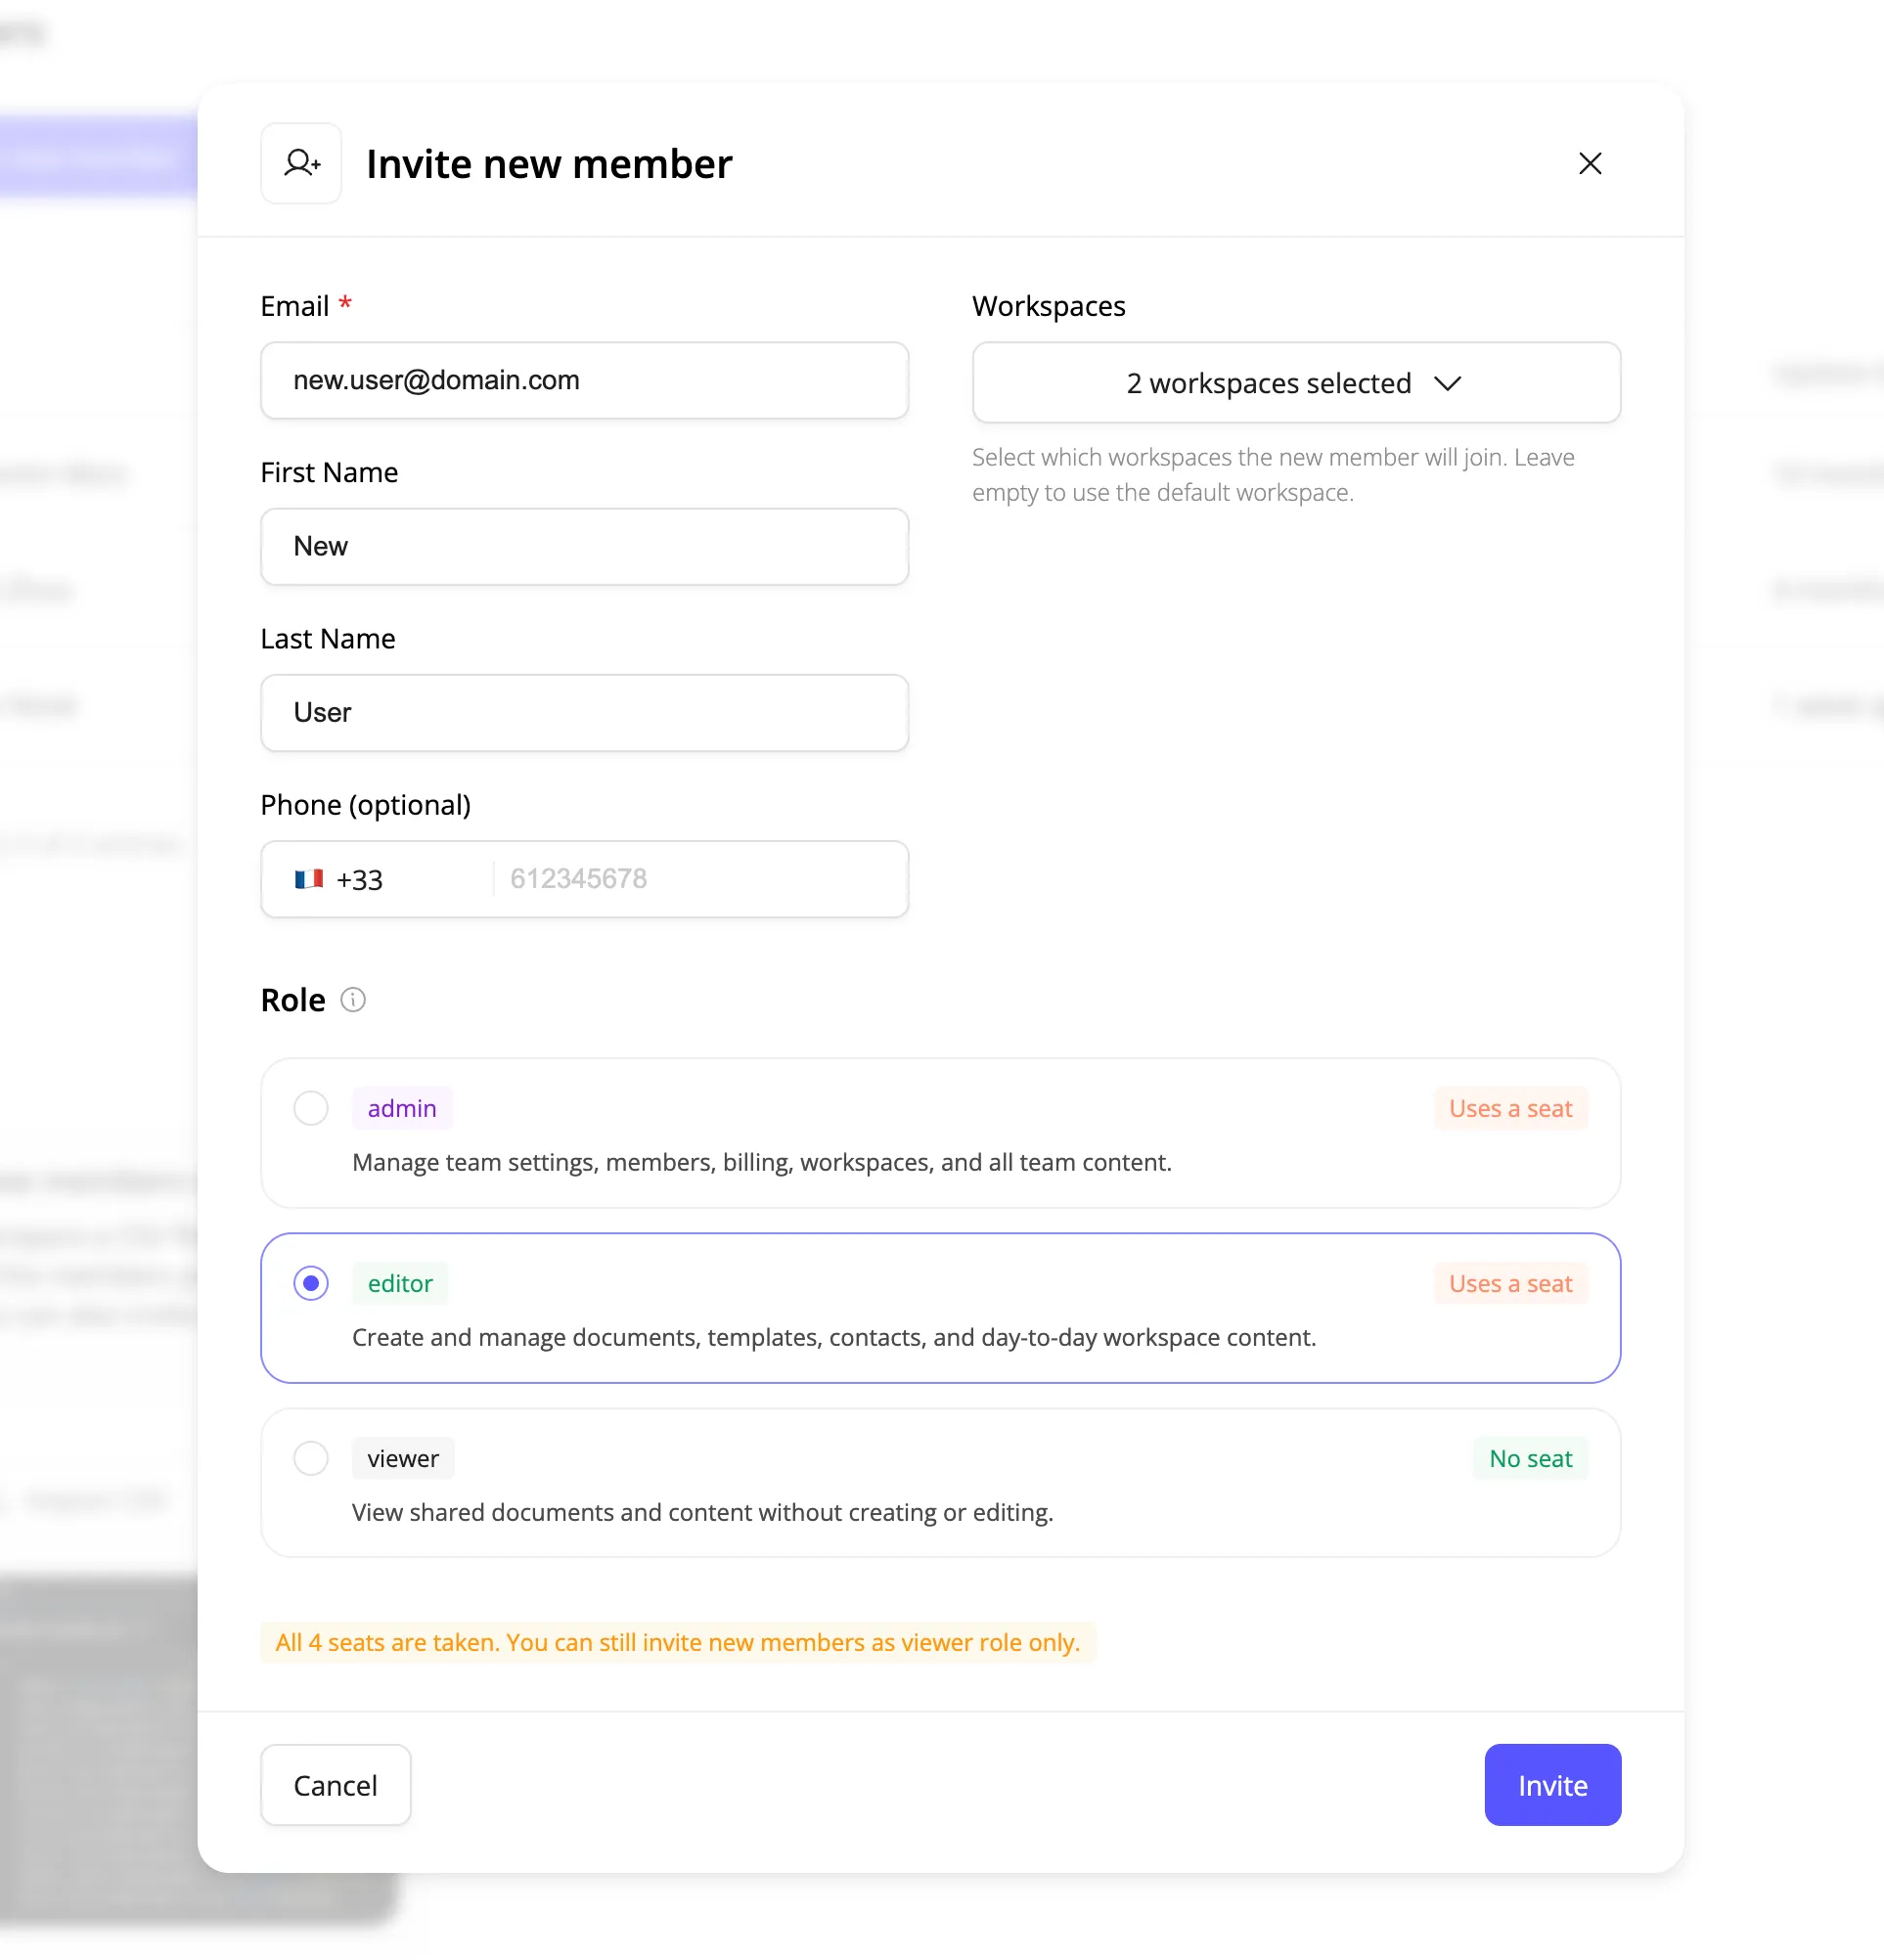
The new member receives an invitation email to join your team.
Choosing a role
| Role | Access | Seat |
|---|---|---|
| Admin | Manage team settings, members, billing, workspaces, and all team content. | Uses a seat |
| Editor | Create and manage documents, templates, contacts, and day-to-day workspace content. | Uses a seat |
| Viewer | View shared documents and content without creating or editing. | No seat |
See Team roles for the full permission breakdown, including custom roles.
Pre-assigning workspaces
Instead of inviting someone and then adding them to workspaces afterward, choose the workspaces upfront in the Workspaces field of the invite modal.
- Click the Workspaces field to open the picker.
- Search for a workspace by name, or scroll the list.
- Select one or more workspaces. The workspace marked By default is used automatically if you select none.
- Optionally click Create workspace to add a new one on the spot.
- Click Done.
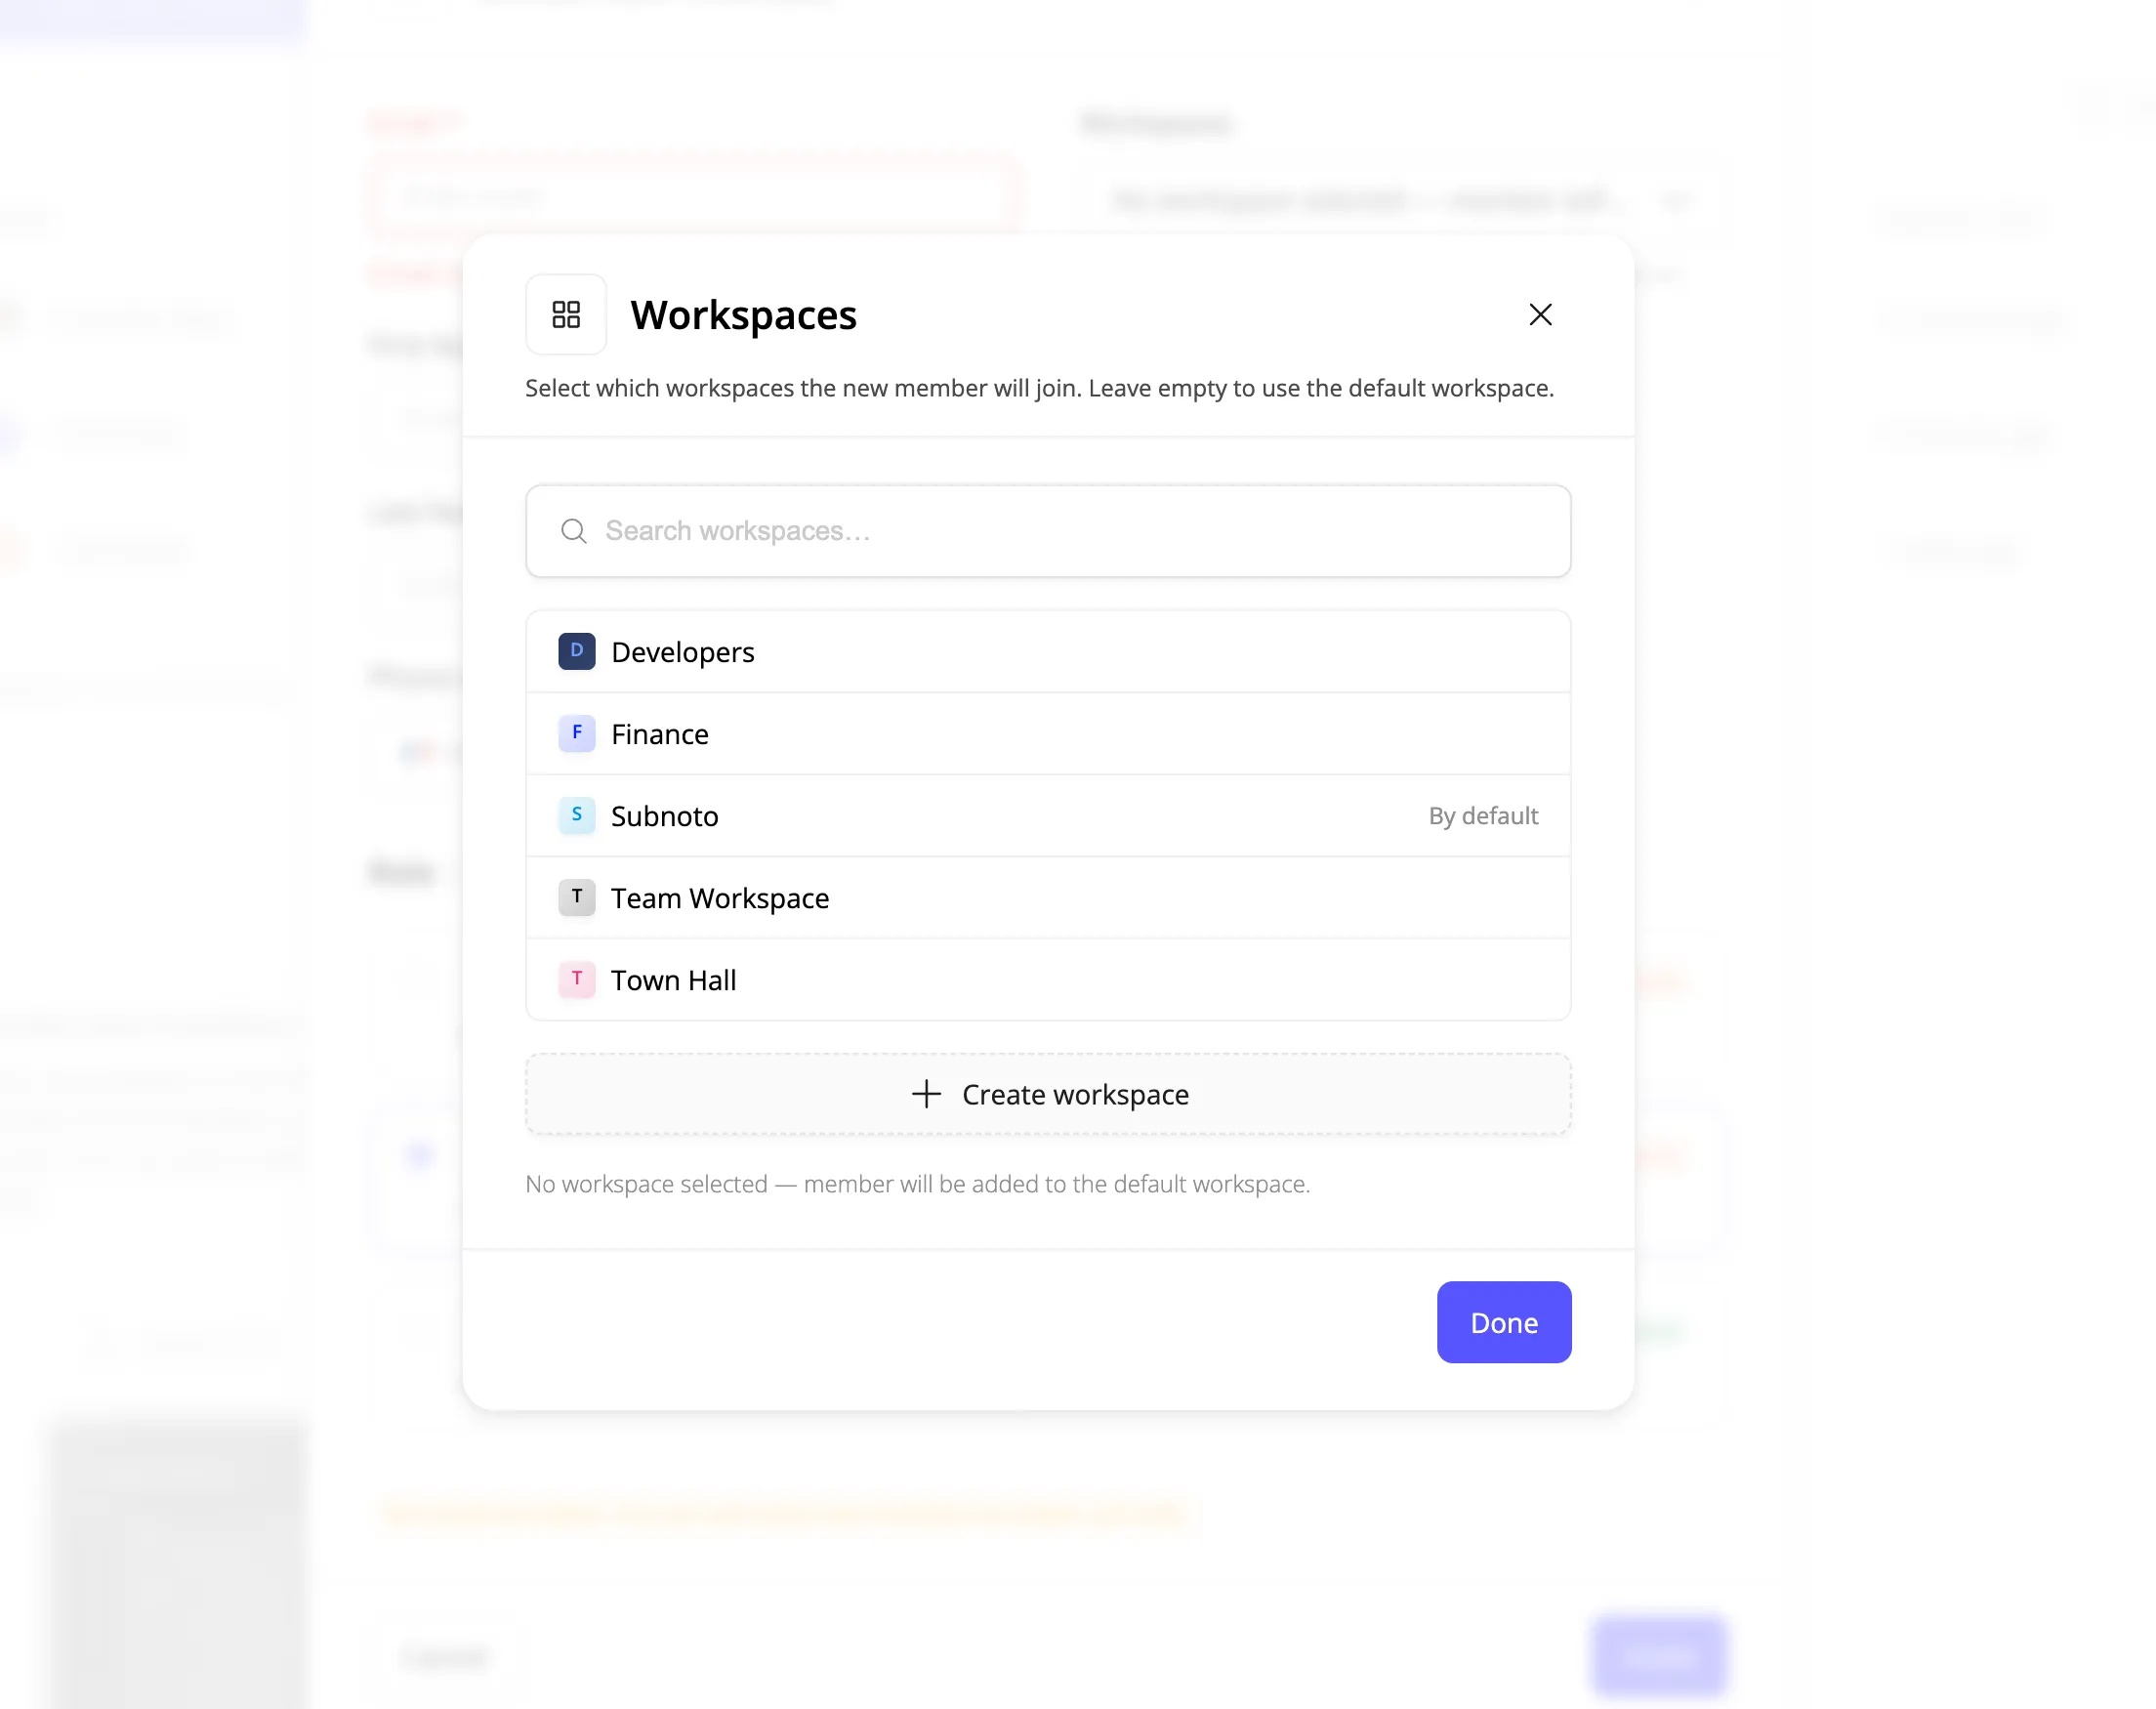
Leaving the field empty adds the new member to the default workspace only. This is the only time you choose a member’s workspaces during the invite flow; afterward, manage their workspace membership from Settings → Workspaces.
Related guides
- Team roles - full permission breakdown per role
- Team configuration - session policy and document upload settings that apply to all members