Self-service signature forms
A self-service signature form is a public link tied to a template. Others enter signer details (email, first name, last name per recipient role) and receive a signature request automatically. You do not create each envelope yourself - one link can collect many signature requests.
Self-service signature forms vs document fields
Section titled “Self-service signature forms vs document fields”| Feature | Self-service signature form | Document input fields |
|---|---|---|
| Purpose | Let outsiders request a signature via a public link | Let signers fill in fields on the PDF during signing |
| Where you set it up | Template sidebar, Self-service signature forms section | Template or envelope editor, field placement toolbar |
| Who uses it | Anyone with the link (no Subnoto account) | Recipients when they open the document to sign |
| Outcome | Creates and sends a signature request automatically | Data is captured on the signed document |

What a self-service signature form does
Section titled “What a self-service signature form does”- You create a form linked to a template (name, optional description, optional response limit).
- You get a unique link (and optionally a QR code). You share that link - e.g. on your website, in email, or in person.
- When someone opens the link, they see a page with your form name and description and one section per recipient (e.g. “Customer”). They enter email, first name, and last name for each.
- They complete a short verification and submit.
- Subnoto creates an envelope from the template with those recipients, sends it (you appear as the sender), and increments the form’s response count.
See What Form Recipients See for the exact experience.
When you can create a form
Section titled “When you can create a form”- The template must have at least one recipient (with a label).
- From the Templates list: The “Create self-service form” action in the row menu is shown when the template has one or more recipients. Use it to create a form quickly.
- From the template edit page: In the sidebar, open the Self-service signature forms section. You can create a form there when the template has one or more recipients.
Creating a self-service signature form
Section titled “Creating a self-service signature form”-
Open the create-form flow
- Option A: From the Templates list, open the actions menu (three dots) on a template and click “Create self-service form” (when the template has at least one recipient).
- Option B: Open the template for editing, then in the sidebar under Self-service signature forms click “Create Form”.
-
Fill in the form details
- Form name (required) - e.g. “NDA request” or “Contract intake”. This is shown to people who open the link.
- Description (optional) - Short text explaining what the form is for.
- Maximum responses (optional) - Leave empty for unlimited submissions, or enter a number to close the form after that many responses.
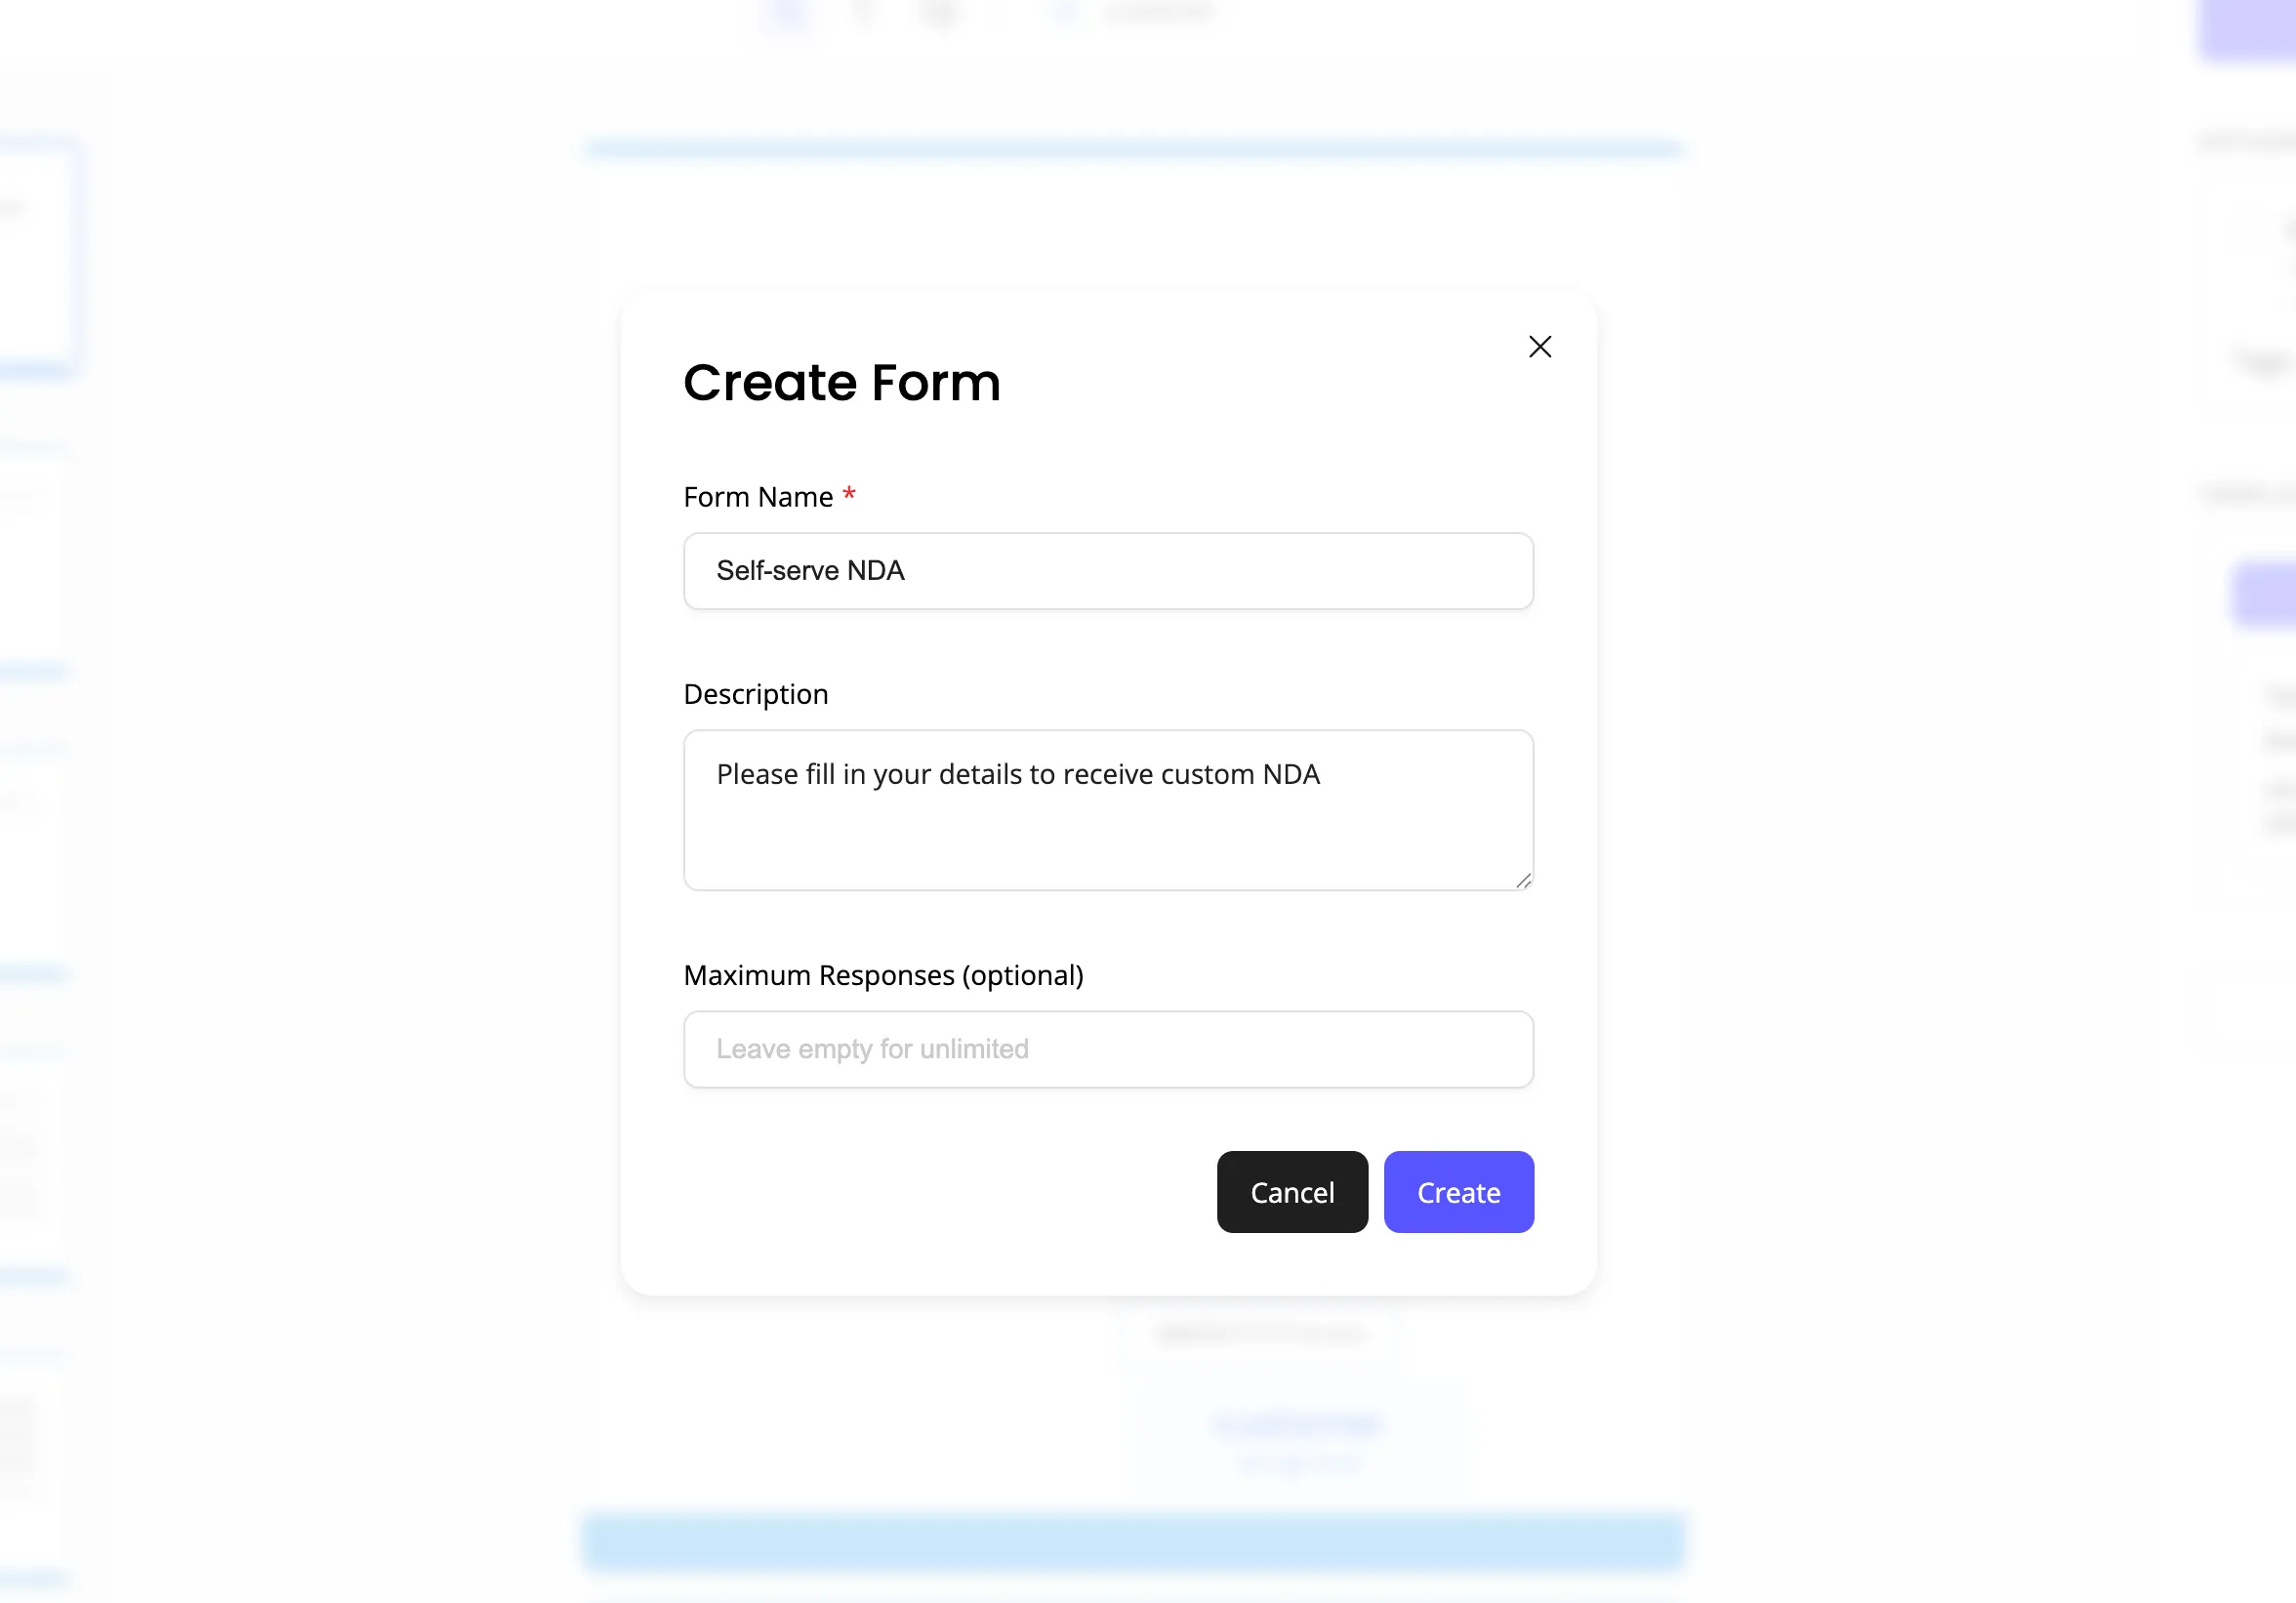
-
Create the form
- Click “Create”. The form is created and a confirmation screen appears.
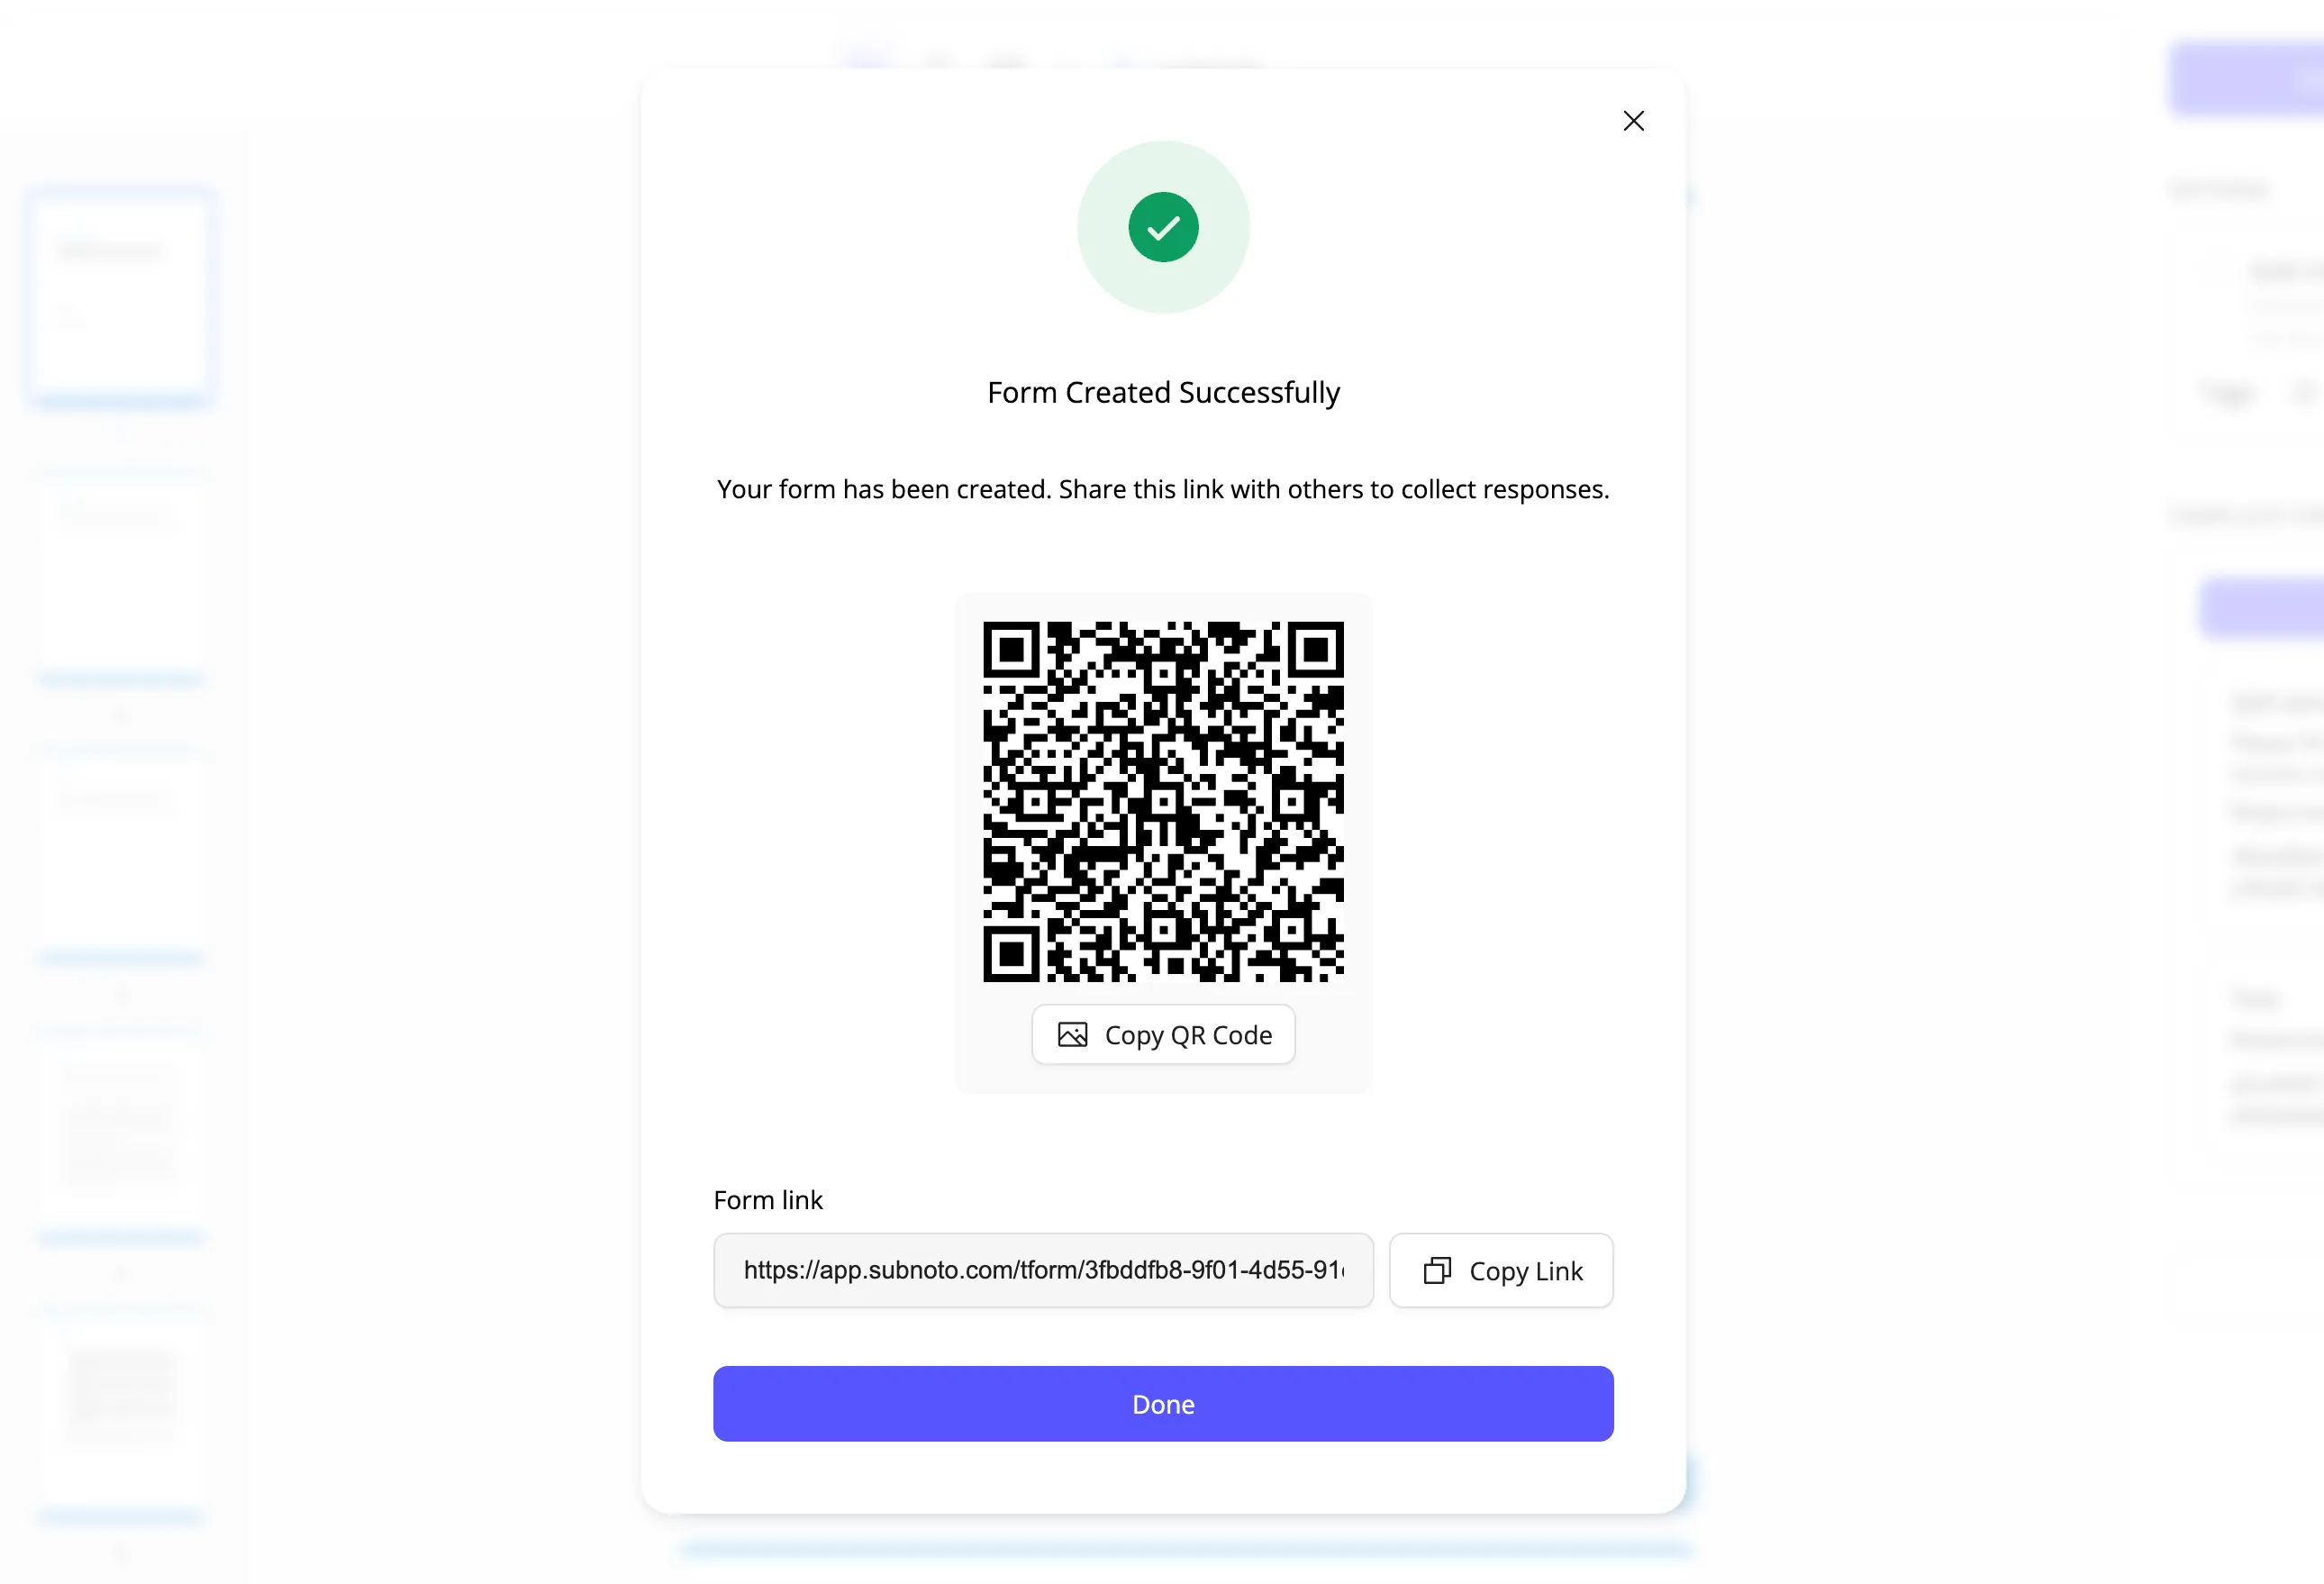
-
Copy the link and optionally the QR code
- The confirmation screen shows the form link (read-only) and a Copy button. The link includes a secret part so only people with the full URL can open and submit the form. Share this link where you want (email, website, etc.).
- A QR code is also shown so you can print it or display it for in-person use. You can copy the QR as an image if needed.
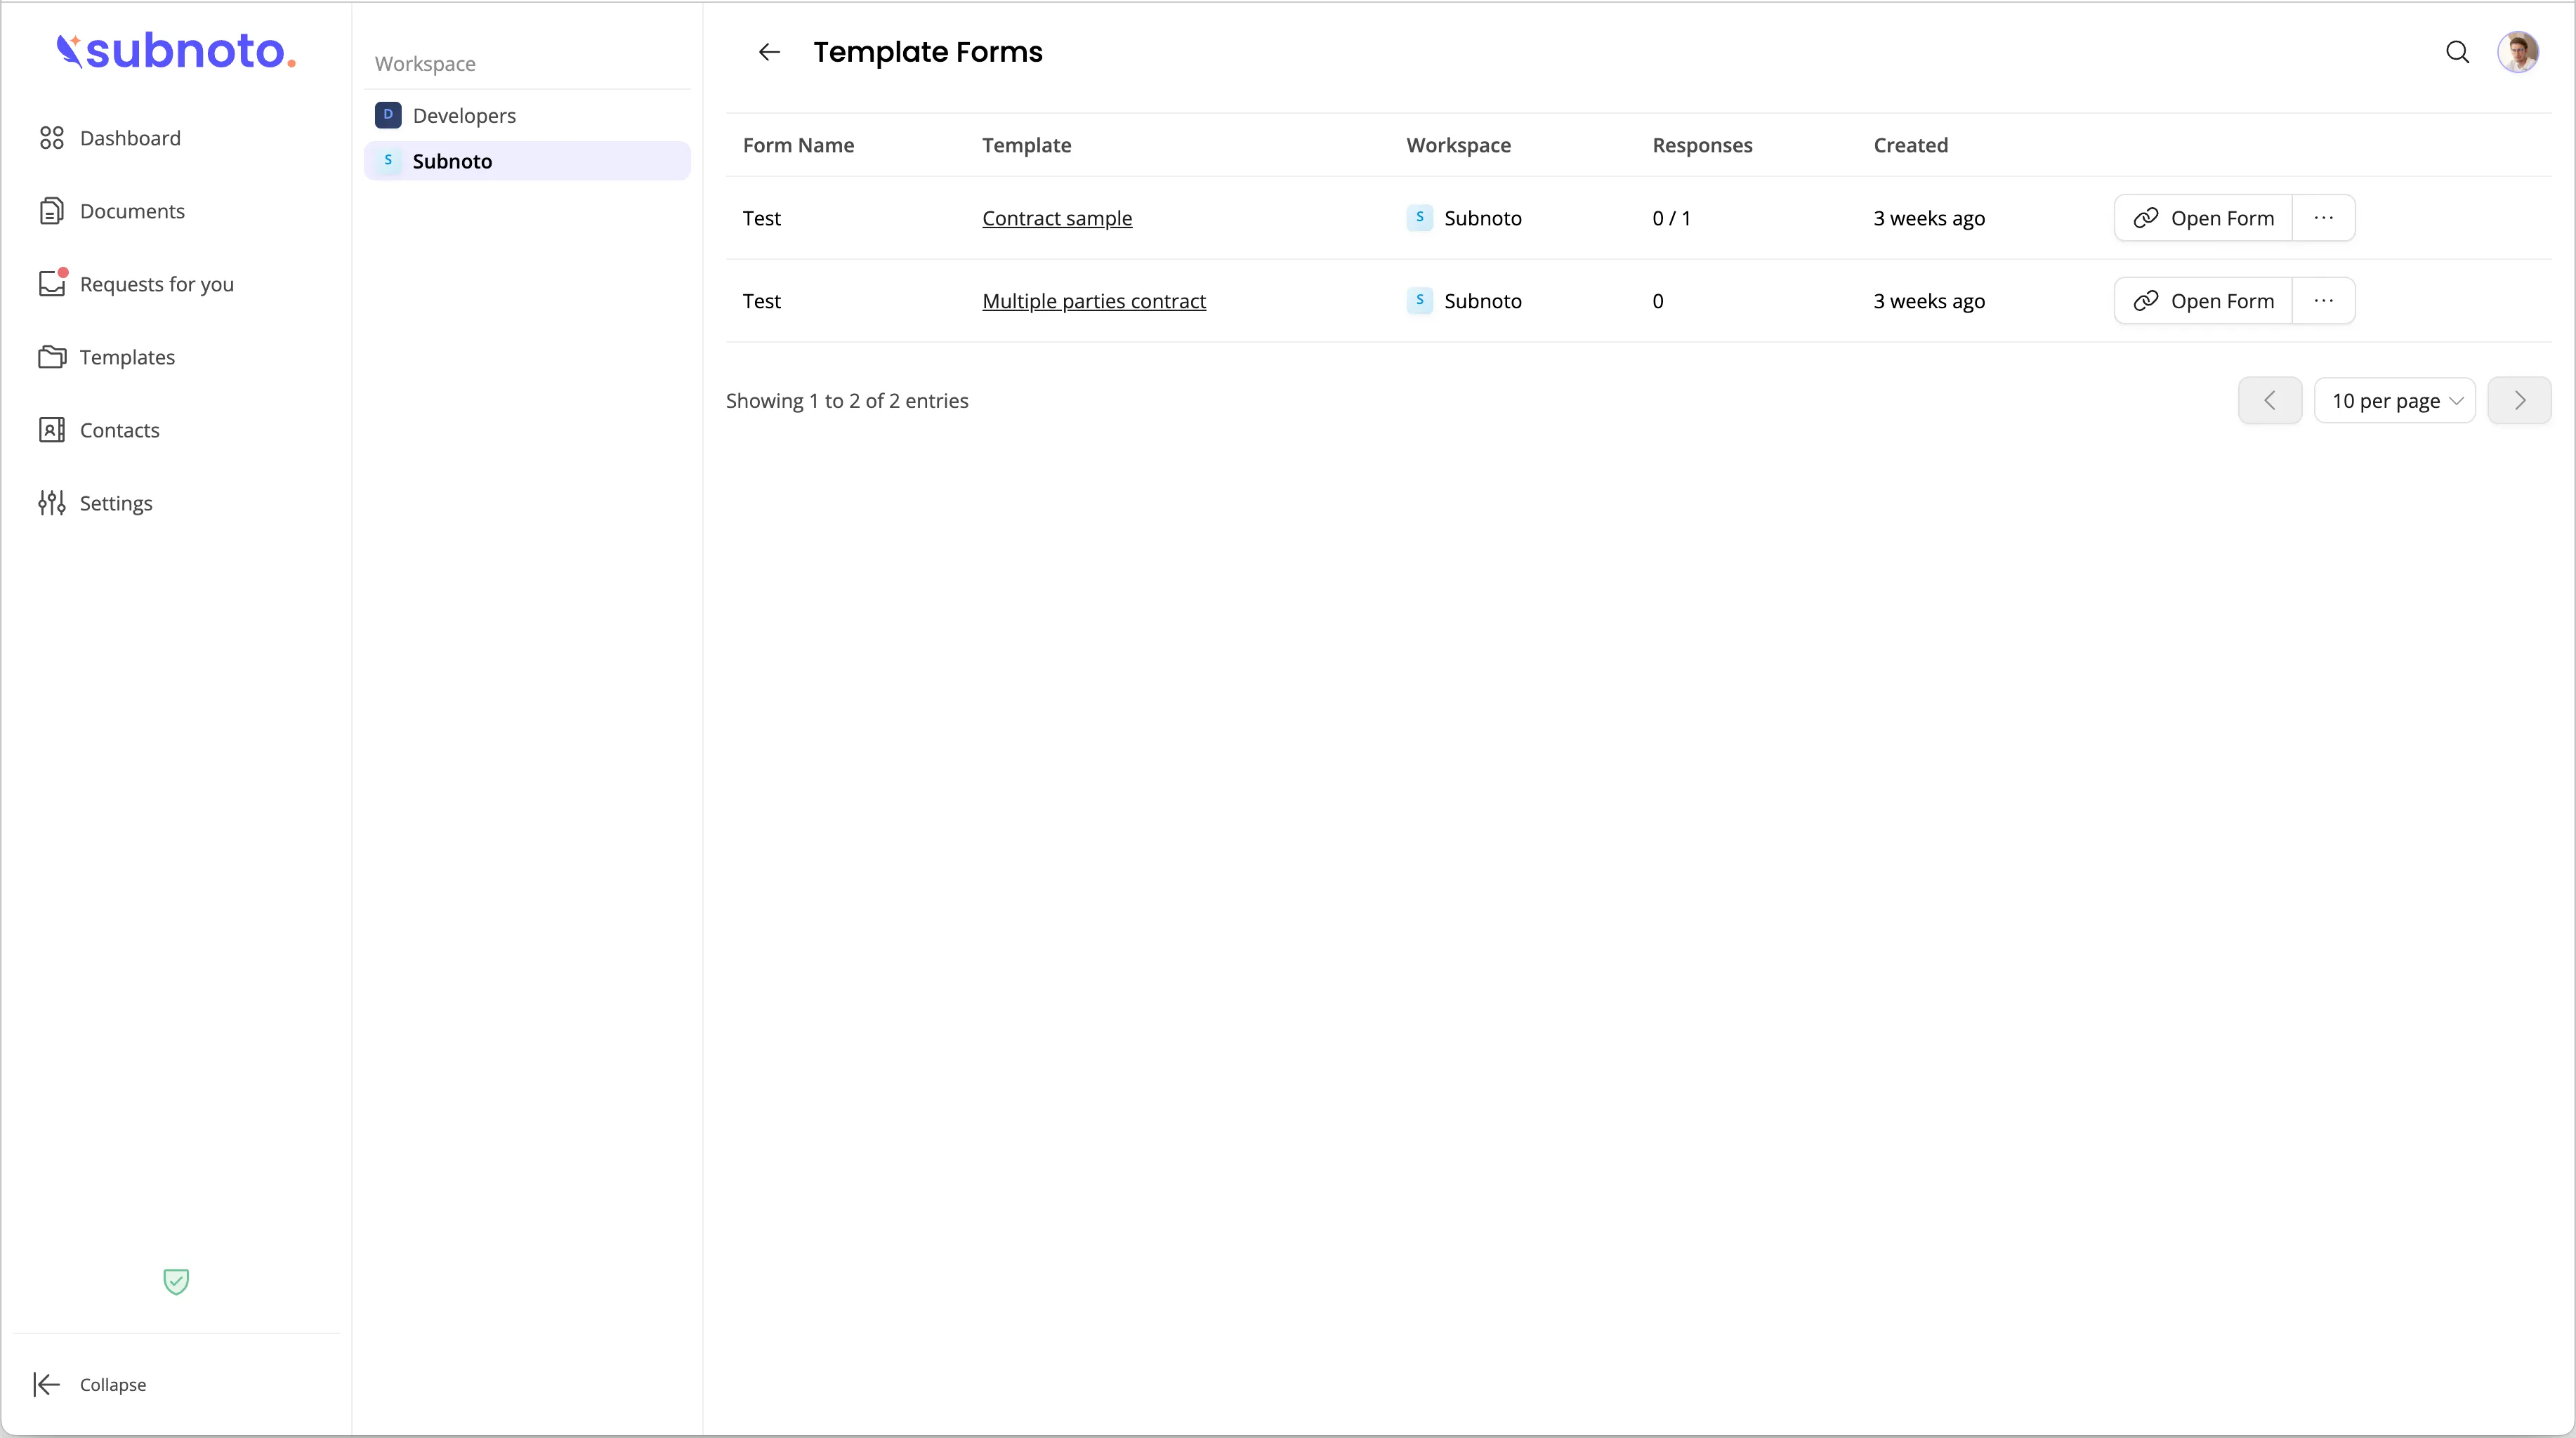
Managing your forms
Section titled “Managing your forms”Self-service signature forms list page
Section titled “Self-service signature forms list page”- Go to Self-service signature forms in the app to see all forms (optionally filter by workspace in the sidebar).
- The table shows: form name, template, workspace, response count, and creation date.
- For each form you can:
- Open Form - Open the form link in a new tab (so you can test it or share the URL from the address bar).
- Copy URL - Copy the full form link to the clipboard.
- Show QR Code - Open a modal with the QR code and the link.
From the template edit page
Section titled “From the template edit page”- In the Self-service signature forms section of the sidebar you’ll see all forms for this template.
- For each form you can View (open the form), Edit (change name, description, or max responses), Copy Link, Show QR Code, or Delete.
Editing or deleting a form
Section titled “Editing or deleting a form”- Edit - Change the form name, description, or maximum responses. The form link itself does not change, so existing shared links keep working.
- Delete - Removes the form. The link will no longer work; anyone with the old link will see an error. Response count and any envelopes already created are not deleted.
Next: To see exactly what recipients see when they use your link, read What Form Recipients See.